benlong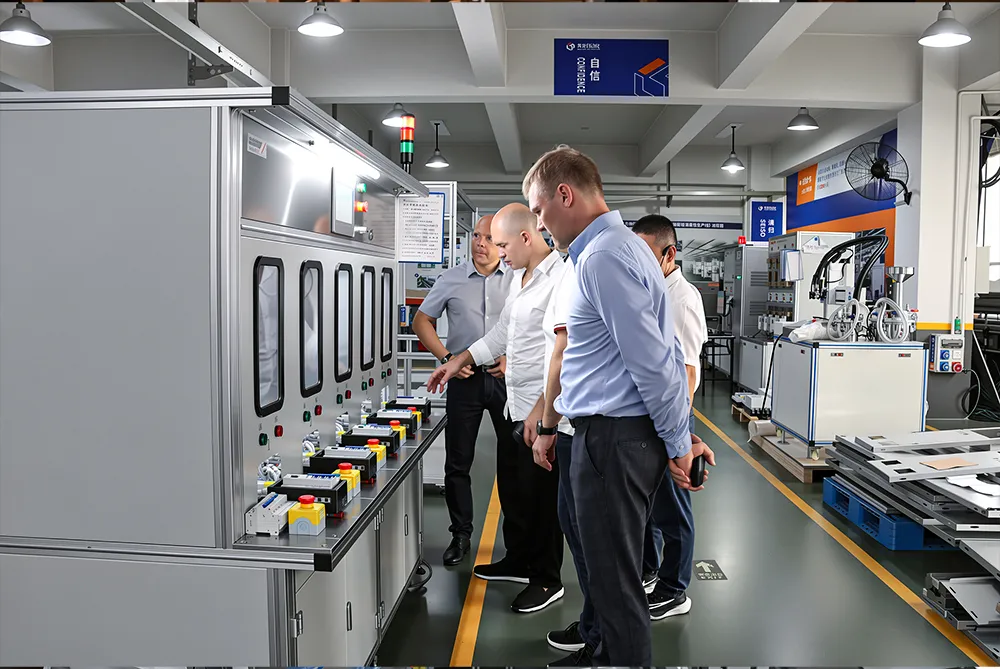


How to Bench Test a Starter Motor: Step-by-Step Guide & Test Bench Principles
When you turn your car’s ignition, sometimes the engine does not start with the key being turned. It might make some strange noises or run sluggishly. Starter is typically considered the culprit in this situation. For this reason, replacing a starter is usually quite expensive. It may take quite a few hours and a lot of money to deal with this problem. However, before you decide to buy a new starter, the very first thing to do is test your current one to see if there is something wrong with it.
This guide will describe how to test a starter motor with the help of few wires, a multimeter, and a battery. More importantly, you will also learn what the test results actually mean. You will find out how a starter that works properly sounds and how the sound it makes when it clicks differs from the initial sound. You will also learn why a starter may pass the test yet still fail to make the engine work. Lastly, you will understand how the mechanic would do the starter test without wasting as much time as any ordinary person would do using standard methods.
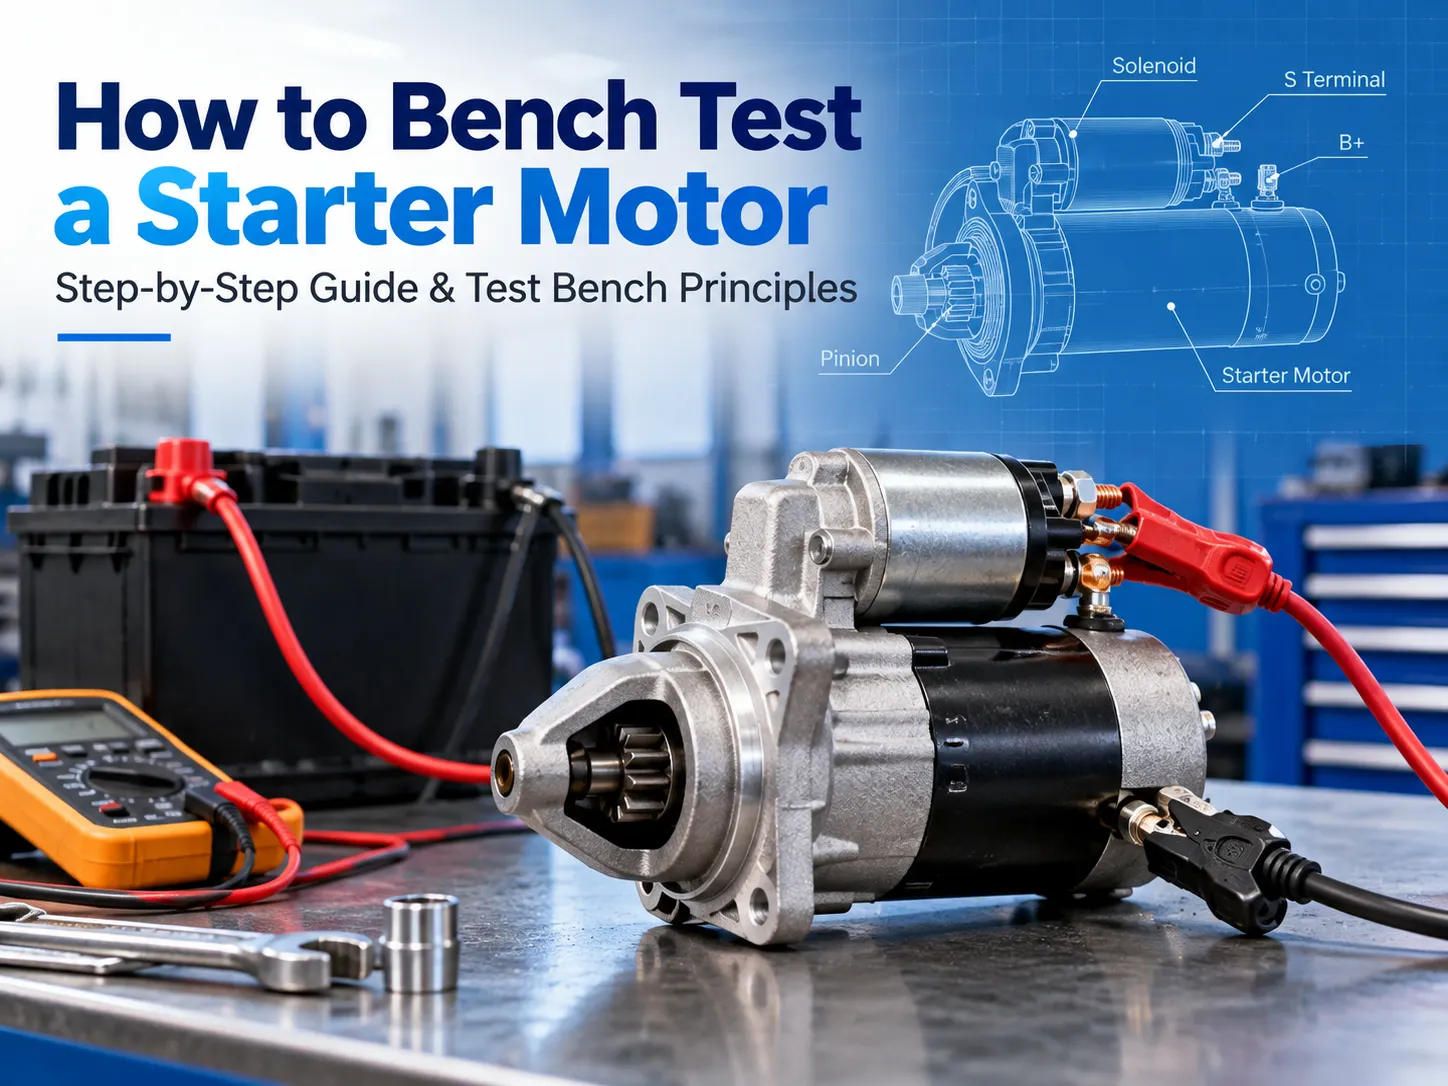
In short, it is necessary to clamp the starter in a vise, attach the negative lead of the fully charged 12-volt battery to the starter housing, connect the positive terminal to the big B terminal and use jumper wires or a remote starter switch to connect the small S terminal. This way, the starter should be perfectly working and spitting out the pinion gear and spinning swiftly. It should stop immediately when you release the switch. In case the starter does not react at the command from the switch or starts making sounds without any movement confirmed, check the details regarding both incidences below.
What a Starter Bench Test Can and Cannot Tell You
Conducting a bench test on a starter involves picking the car out of the mix. A starter receives pure electricity from the battery and a perfect ground from the jumper cable, so if anything goes wrong, you can be pretty sure that the problem lies in the starter. If the starter works, then you know to look somewhere else, like the battery, cables, ignition switch, relay, or engine.
Running a simple no-load bench test checks three things at the same time:
- 1. The solenoid – the small tube on top acting as a heavy-duty switch that operates the pinion gear.
2. The motor – the main body with the armature, brushes, and field windings that do the spinning.
3. The drive (Bendix) and overrunning clutch – the assembly for the pinion gear that meshes with the flywheel of the engine.
A simple no-load bench test cannot tell you whether the starter can handle the load of turning the actual engine. A starter may spin freely in the open air and may still stall under compression. You should note that this is the reason why this guide instead includes the current draw factor, which makes it much closer to the truth, and this is also why a starter that has passed the bench test is not necessarily a good starter. Remember this and you will avoid the biggest diagnostic trap.
Before You Pull the Starter: 5-Minute Checks in the Car
The time it requires to remove a starter can range from ten minutes to two hours depending on the car model being worked on. Instead of grabbing the wrench first, it is better to go through the following simple checks. You might want to know how to test a starter motor without removing it, as this series of tests will help you identify a lot of problems not related to the starter.
The first thing – you need is to check the battery. When the engine is off, the healthy battery reads about 12.6 V. If the reading is above 12.4 V, the battery is partially discharged. When the battery has a reading of about 12.0 V or lower, there is no guarantee the engine can start. A weak battery would make sounds and provide low engine cranking and there is impossible to distinguish such a problem from the starter.
The second thing – you need to do is watch the dashboard lights. If the lights go dim or die, it means there is a problem with either the battery or a cable connection. If the lights remain bright, the signal may not reach the starter yet.
The third – advice refers to checking the battery and engine ground terminals. One should examine both terminals for the presence of white or green corrosion and tight terminals.
On automatic cars, moving to the neutral position may help start the engine. On manual cars, pressing the clutch down may help take the starter signal out.
The last idea – that must be accomplished is voltage check at the S terminal of the solenoid. Let your accomplice turn the key to the START position while you check the voltage level at the S terminal of the solenoid. If the battery voltage present at the terminal is lower than 10 V, the problem relates to the relay system, fuses, ignition switch, or wiring.
Otherwise, if the battery is in a proper condition, connections are clear and there is voltage present at the S terminal, there is no other choice rather than removing the starter from the vehicle.
Tools You Need for a Starter Bench Test
| Item | Why you need it |
|---|---|
| Fully charged 12 V car battery | A weak battery gives false failures. Aim for 12.6 V at rest. |
| Heavy jumper cables (4 gauge or thicker) | Thin cables heat up and drop voltage, making a good starter look weak. |
| Bench vise | The starter twists hard when it spins up. It must be held firmly. |
| Remote starter switch or a short jumper wire | To send power to the S terminal safely and briefly. |
| Digital multimeter | For battery voltage, voltage at the starter during the test, and solenoid winding checks. |
| DC clamp meter (optional but very useful) | Measures current draw, which tells you far more than sound alone. |
| Safety glasses and gloves | Sparks happen, and a spinning pinion gear can catch loose clothing. |
Safety First
- Before removing the starter from the vehicle, ensure that the negative battery cable is disconnected as the B terminal remains energized at all times. Therefore, using a wrench to touch it with the chassis will create a spark.
Use protective eye wear. Connecting any high current cable will cause sparks and batteries release hydrogen gas.
Make the final connection away from the battery and not directly over it.
Hold the starter by the mounting flange or the ear. The casing can crush the motor housing and the solenoid that are quite fragile.
Keep your fingers, clothing and any other materials away from the pinion gear which tends to travel with considerable speed.
Do not operate the starter for longer than 5 seconds. Starters are designed for intermittent operation and proved to overheat quickly in continuous running mode.
How to Bench Test a Starter Motor: Step-by-Step
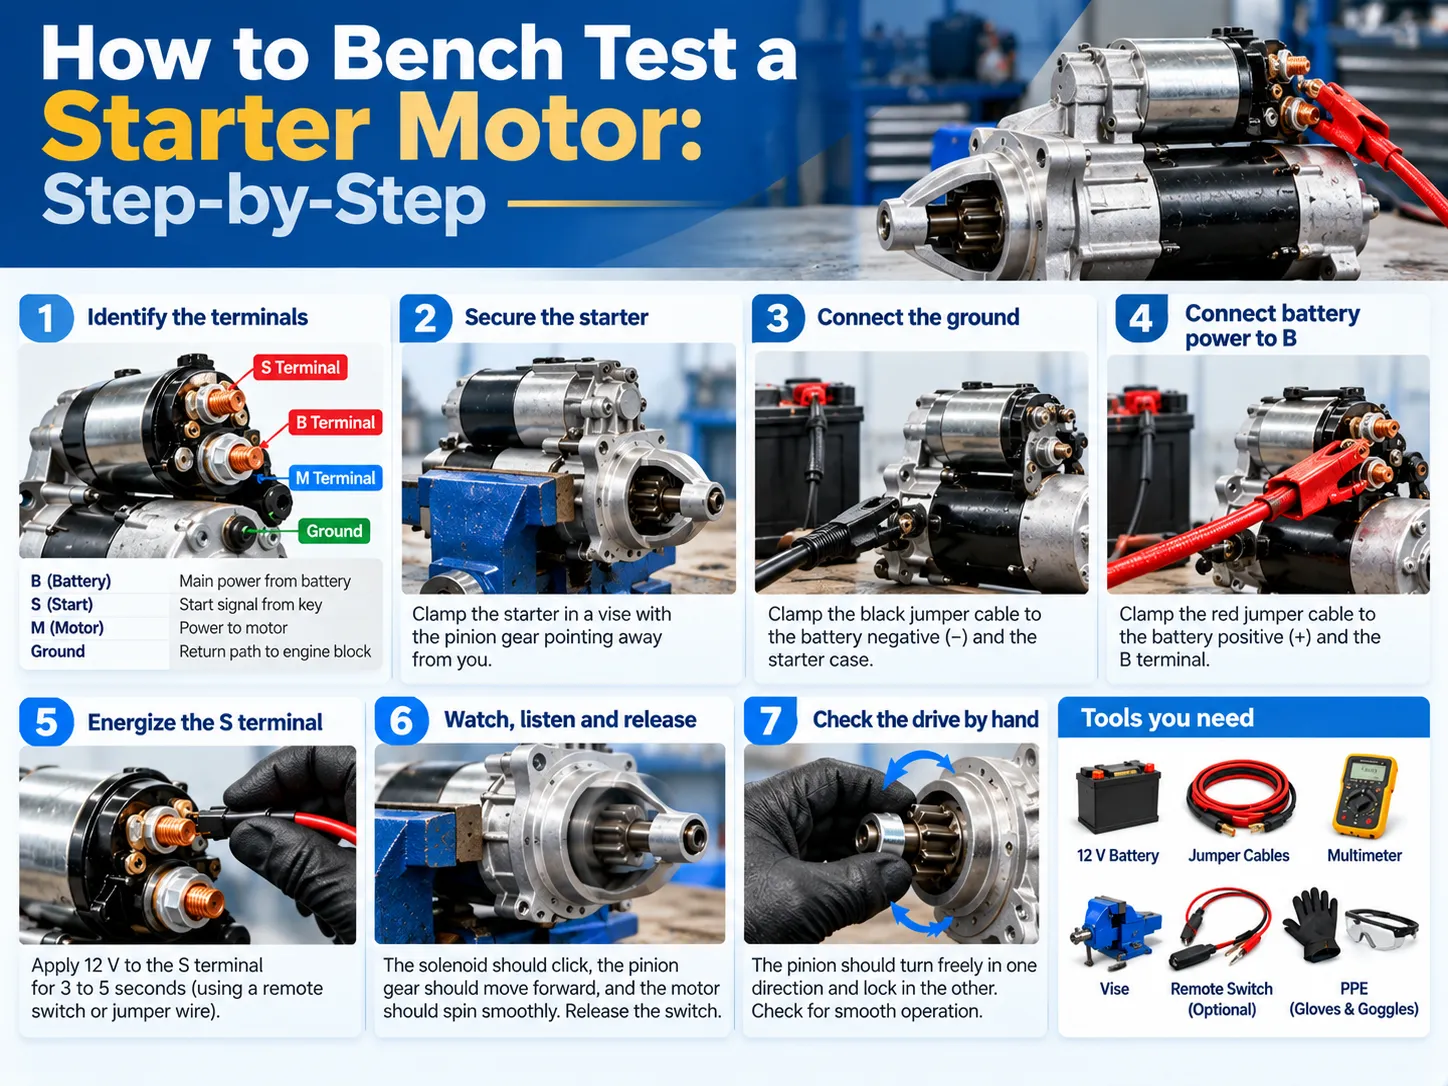
Step 1: Identify the terminals
Most starters have three electrical points you care about:
| Terminal | What it looks like | What it does |
|---|---|---|
| B (battery, sometimes marked 30 or BAT) | The largest stud on the solenoid, where the thick battery cable connects | Constant battery power in |
| S (start, sometimes marked 50) | A small stud or spade terminal on the solenoid | Receives the start signal from the key or push button |
| M (motor) | A second large stud, joined to the motor body by a short copper strap | Carries power from the solenoid into the motor |
| Ground | The starter case and mounting flange | The return path; the starter grounds through the engine block |
Some old starters have an extra R or I terminal that connects to the ignition coil when cranking the engine. You can skip it while testing on a bench.
Step 2: Secure the starter
Hold the starter in a vice by the flange and make sure the pinion gear is facing outward. If you do not have a vice, then ask a friend to hold it firmly with both their hands and wearing gloves, but the vice is a safe option. An unsecured starter might jump away.
Step 3: Connect the ground
Hook up a jumper cable from the negative terminal of the battery to the starter case or mounting flange. If needed, scrape any paint or rust away to create a good contact. Poor ground is the most common reason for a negative result on a good starter.
Step 4: Connect battery power to B
Connect another jumper cable to the positive terminal of the battery and the other end to the B terminal. At this point nothing should happen. If the starter spins at that time, this means that the solenoid contacts are stuck.
Step 5: Energize the S terminal
Now energize the S terminal for 3 to 5 seconds. If you have a remote starter switch, you will connect the switch between B and S terminals. In case there is no remote starter switch around, you can take a small piece of wire and briefly touch positive terminal and S terminal.
Step 6: Watch, listen and release
A working starter does 3 things: it clunks solidly, the pinion gear engages and the motor starts running. When you release the switch, taking the pinion back and motor shuts down. If you have a clamp meter, put it around red cable and take the readings. If you have a voltmeter, ask your friend to measure the voltage during the testing process.
Step 7: Check the drive by hand
Now that everything has been disconnected, take the pinion gear and turn it. It should be able to turn easily in one direction and lock (or turn the armature) in the other direction. This one-way action is a result of the overrunning clutch. If the pinion gear turns freely in both directions, the overrunning clutch is bad, and the starter will whine without cranking the engine. If the gear doesn’t turn in either direction, then the drive or motor has seized or locked.
What a Good Starter Looks and Sounds Like
After you have performed a few bench tests of the starter motor, you will find that you can determine its performance by the sound it produces without having to rely on reading other instruments. The following are the criteria that you can use in order to tell if the motor has passed the test.
There should be one loud clunk from the solenoid at the beginning of the test and the sound of buzzing or chattering should be absent.
You should hear the pinion gear moving from the rest position.
The motor should speed up as soon as the switch is activated without any strange grinding noises.
There should be no smell of smoke or burning and no excessive sparking.
The pinion gear should disengage the motor immediately after the switch is released.
The voltage at the starter should be higher than 10.5 V and the current draw of the motor should be acceptable with respect to the standard limits of the current capacity for the model of the starter being tested.
Bench Test Results Explained: What Each Symptom Means
This is where the bench test really earns its keep. Each failure pattern points to a different part inside the starter.
| What you see and hear | Most likely cause | What to check next |
|---|---|---|
| Nothing at all – no click, no spin | Poor ground or connection, dead battery, open solenoid windings | Re-check ground and battery voltage; measure solenoid windings with a multimeter |
| One loud click, no spin | Solenoid works but its internal contacts are burnt, or the motor itself is dead (worn brushes, open armature) | Jump B directly to M to test the motor alone |
| Rapid clicking or chattering | Voltage collapsing (weak battery or thin cables) or an open hold-in winding | Charge the battery, use heavier cables, test the hold-in winding |
| Pinion kicks out but motor spins slowly or weakly | Worn brushes, dirty commutator, dry or worn bushings, shorted armature | Measure current draw and voltage at the starter |
| Motor spins fast but pinion does not move out | Sticking solenoid plunger, broken shift fork, damaged drive | Inspect the drive and shift linkage; many shops replace the starter |
| Loud whine, pinion spins freely both ways | Overrunning clutch slipping | Replace the drive or the starter |
| Grinding or scraping noise | Dry bearings, worn bushings, armature rubbing the field magnets | Stop testing; the starter needs rebuilding or replacing |
| Keeps spinning after you release the switch | Solenoid contacts welded or plunger stuck | Disconnect immediately; replace the solenoid or starter |
| Smoke, burning smell or heavy sparking | Shorted windings or burnt brushes | Stop immediately; the starter is finished |
The starter only clicks: solenoid or motor?
The most frequent answer is that there is a simple method of identifying the faulty half. Disconnect the S wire from the circuit and connect the B terminal to the M terminal quickly with the help of a thick wire (in this case you are bypassing the internal contact of the solenoid). If the motor is working now, the motor is okay and the solenoid contacts are broken. Many solenoids can be repaired with a cheap contact kit or only replaced. If after this solution of power is supplied to the M terminal, the motor still does not rotate, then the motor itself has problems (usually because of a worn-out brush or faulty armature). Please, remember that in this test the pinion will not go out, for the solenoid does not move.
The solenoid engages but the motor does not turn
When you hear the kick-out of the pinion, but not spinning, confirm the voltage at B terminal of the motor while engaged. If the voltage swings down, check the battery and cables. If the voltage stays steady but the M terminal reads very low, the solenoid contacts are not passing current. If the M terminal shows full voltage but the motor does not turn, the motor circuit is open or there is a lockup.
Testing the Starter Solenoid with a Multimeter
With the starter disconnected from the battery, set your multimeter to the lowest resistance (Ω) range and check the two coils inside the solenoid. If you have not used the resistance and continuity functions much, our guide to testing continuity with a multimeter covers the basics.
| Test | Probe placement | Typical good reading | Bad reading |
|---|---|---|---|
| Pull-in winding | S terminal to M terminal | Very low, usually well under 1 Ω | OL (open winding) |
| Hold-in winding | S terminal to starter case | Low, often around 1 to 2 Ω | OL (open) or 0 Ω (shorted) |
| Motor circuit | M terminal to starter case | Very low, close to 0 Ω | OL means brushes or armature circuit is open |
| Insulation check | B terminal to case (solenoid at rest) | OL | Any low reading means B is shorted to ground |
Exact values will differ depending on the starter, so make sure you cross-check with the service manual for your particular model whenever possible. The important factor is the pattern rather than the exact value, as getting an OL on a winding means there is a broken coil, whereas getting a reading of 0 Ω where there should be some resistance indicates a short.
The two windings work together; in that the pull-in winding is a strong one and moves the plunger forward, whereas once the plunger closes the main contacts, the pull-in winding disconnects itself and the weaker hold-in winding holds the plunger in position. It is for this reason that when there is an open hold-in winding, there will be a rapid clicking, since the plunger will pull in, then immediately release again, and repeat the process.
Voltage and Current Draw: The Numbers That Tell the Real Story
Listening is useful, but numbers are better. A clamp meter around the positive cable and a voltmeter across the starter turn a guess into a diagnosis.
Voltage during the test
While the starter operates, measure the distance between the B terminal and the starter case. When in good condition, the reading should be greater than approximately 10.5 V. A dropped voltage level indicates that the starter is drawing too much current or the battery and cables are insufficient. You should also measure the battery terminals at the same time; if the battery value is high while the starter value is low, the fault is not with the starter but rather the cables and clamps leading to it.
No-load current draw
All the starters come with a required no-load current specification. Small-sized passenger cars come with a specification somewhere between 50 to 90 A while the large V8, truck and diesel starters draw much more. The current specification can be taken as just an estimate and that the exact specification can be checked at the manufacturer or dealer for the part number being used. The implication of the current is as follows.
| Reading | Speed | What it usually means |
|---|---|---|
| Within spec | Fast and smooth | The starter is healthy, at least at no load |
| Higher than spec | Slow | Mechanical drag (tight or dry bushings, bent armature) or shorted armature or field windings |
| Very high | Barely turns or not at all | Seized armature or a winding shorted to ground |
| Lower than spec | Slow | High resistance: worn brushes, dirty commutator, burnt solenoid contacts, poor connection |
| Zero | None | Open circuit: broken brush lead, open armature, or solenoid not closing |
It can be noted here that high current and low speed indicate that the bearings are at fault or there is short somewhere. On the other hand, when the current is low and the speed is also low, it signifies that the current is being limited in some way.
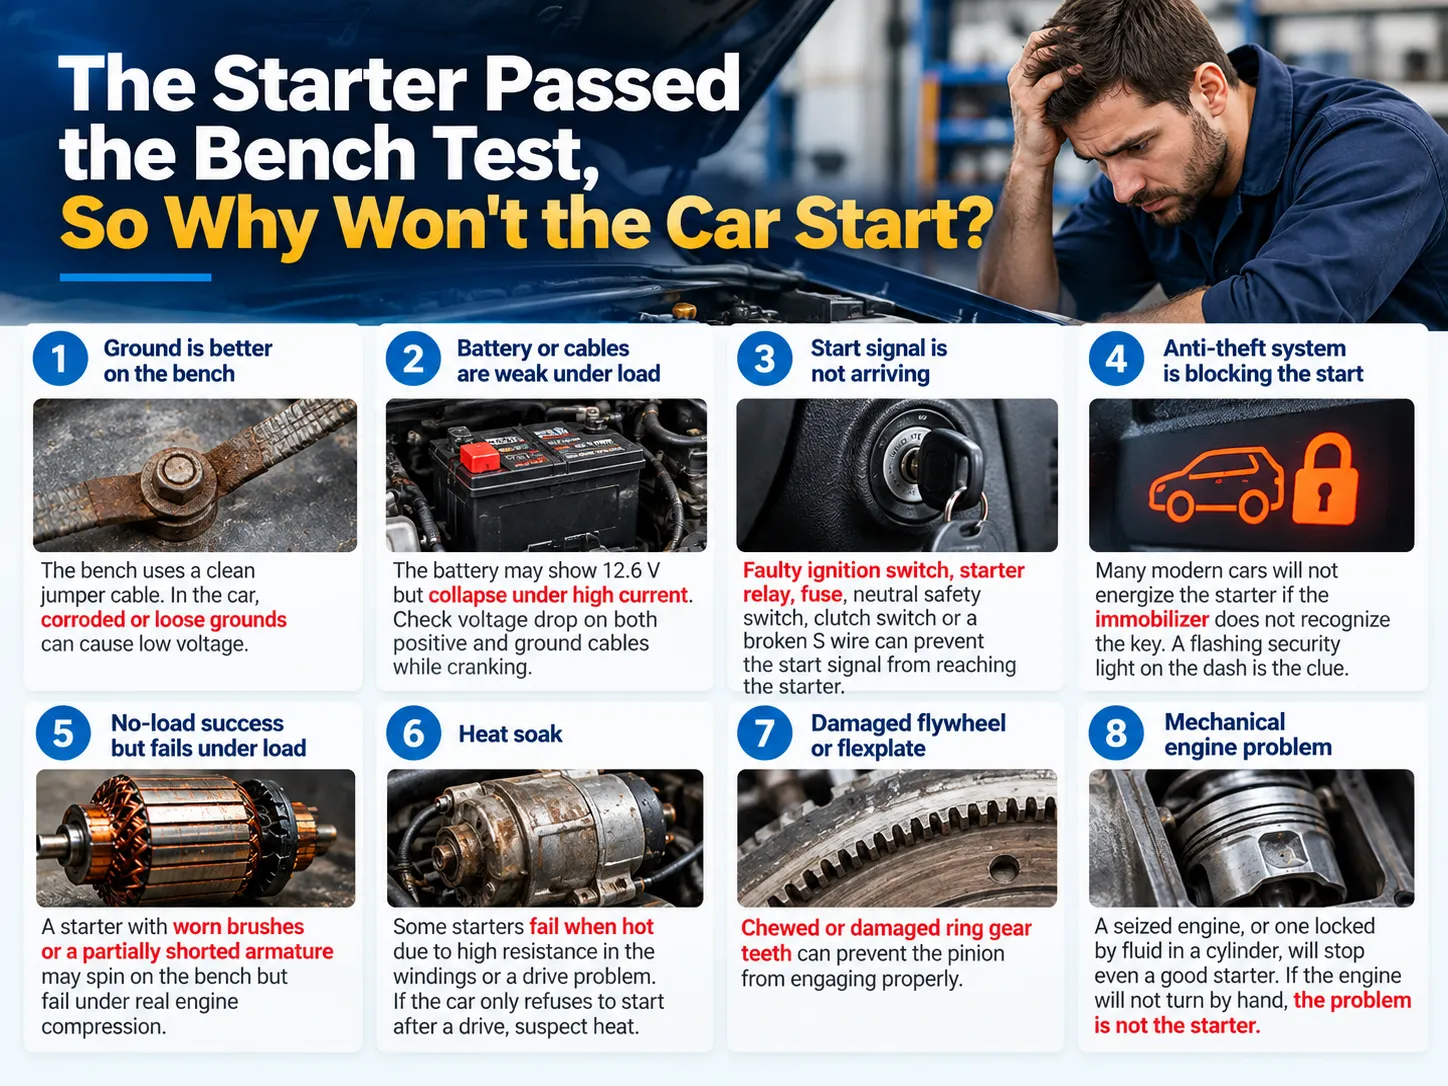
The Starter Passed the Bench Test, So Why Won’t the Car Start?
An area that sees a lot of DIY repair failures is the starter. It works fine on the bench, but after reinstallation of the part, it turns out that the starter fails to start the engine. The following points are some of the most common reasons for this.
- The starter has a better ground at the workbench than in the car. While the starter is grounded via a clean jumper clamp at the bench, it is grounded in these conditions at the workplace through its mounting screws, the engine block, and the grounding strap of the engine. The starter can suffer because of a corroded or broken grounding strap.
- There might be weak battery or cables under load. Even if the battery shows 12.6 volts, it can fail to deliver up to 150 amps under load. The starter should be load tested. No-load tests as well as voltage drop tests carried out during cranking can help. If there is a drop of 0.5 volts on the positive cable, or a few tenths of a volt on the ground wire while cranking, the cable or a connection can be at fault.
- The signal may not be delivered to the starter. There may be an issue with the ignition switch, starter relay, fuse, neutral safety switch, clutch switch or the S wire. The voltage at the S terminal must be measured with the key in the ignition.
- The starter may be blocked by the anti-theft system. Modern cars have an immobilizing mechanism, which will not allow to start the car unless the key is recognized. The flashing security light on the dashboard may signify this.
- No-load success hides a weak starter. The starter working on the bench may not work when the car is running. Peformed at the bench, it does not require enough torque to turn the engine under load. A starter with worn out brushes and a shorted armature may successfully pass a no-load test performed on the bench while failing to perform its task on-site.
- Heat soak. While some starters pass no-load tests when the temperature is low, they may fail to perform properly at high temperatures. If the starter does not work only after a drive, heat should be suspected as an issue.
- Damaged flywheel or flexplate teeth. The starter may have a damaged ring gear.
- A mechanical engine problem. There may also be issues with the engine itself; for instance, it may be jammed by liquid in a cylinder. If it is impossible to turn the crankshaft bolt by hand with a breaker bar, the problem lies not with the starter.
A useful distinction is that there is no crank and crank-but-no-start. If the engine rotates at normal speed but does not ignite, it means that the problem lies not with the starter, but with fuel, spark, or engine management system.
How to Get a Failing Starter to Work (Temporarily)
At times, reaching home is essential. These methods may help you gain additional usage out of a malfunctioning starter, but they will not fix it:
Hit the starter body with a hammer handle while a colleague puts the key in the ignition. This may unstick the brushes or the solenoid plunger for some time. Start to notice how the starter is nearly done.
Jump-start the car. Using another battery to generate extra voltage might revive a weak starter.
Another thing to do is clean and tighten the battery terminals and move the cables. Quite often, loose connection is the reason for a stalled car.
Move between gears. In automatic transmission cars, switch to Neutral or move it back and forth in Parking mode.
Use a remote starter switch. Connect the two terminals (B and S) to bypass the start circuit.
Push start a manual car if nothing else helps. By doing this, one should put the gear lever into the second gear and start rolling while releasing the clutch.
If you succeed with the tapping trick, it makes sense to replace the starter right away.
Can a Parts Store Bench Test Your Starter for Free?
Yes, it’s a good idea to have this done if you do not have access to a clamp meter. O’Reilly Auto Parts provides free starter and alternator testing either on the vehicle in the parking area or off the vehicle using an in-store bench tester. Many similar shop chains offer the same kind of service. Users typically call their nearest store to get such information. The tests usually measure both the voltage and current they have and provide a pass or fail printout based on a comparison of the user data with the numerous specifications from the database.
Similar testers can be used by anyone who needs to test an alternator. Users come and bring the alternator clean and dry to be tested.
How a Professional Starter Test Bench Works
A starter test bench, whether located at a parts shop or sitting on a mechanic’s workbench, performs the same work that one would do by hand except instead of using his or her ears, the mechanic uses measuring equipment. Most of them are composed of four components:
| Building block | What it does | Your DIY equivalent |
|---|---|---|
| Controlled power supply | Delivers steady 12 V or 24 V at high current, so results are not skewed by a tired battery | Your car battery and jumper cables |
| Current and voltage measurement | High-current sensors record exactly how many amps the starter pulls and how far voltage drops | Clamp meter and multimeter |
| Speed and load unit | Measures armature speed and, on better benches, applies a braking load to simulate cranking an engine | Listening for fast, smooth spin |
| Controller with a spec database | Compares every reading to limits for that part number and prints pass or fail | Comparing against the service manual |
This is the essence of every bench check: provide a stimulus, get the result, compare the results to standards, and draw a conclusion. A load unit is the reason why a reliable bench is more than just a quick check, because it helps find weak starters that could spin with no resistance.
From Starter Motors to Circuit Breakers: Same Logic, Different Product
When you examine the starter solenoid, you can see that what you are looking at is an electromagnet which closes a set of heavy contacts: namely, a coil, a moving plunger and contact discs. In fact, the design is the same as that of an AC contactor, which is the switch used to start electric motors in industry. The questions posed by the technician remain the same: at what voltage does the coil pull in the contacts and at what voltage does it drop out.Our guide on how to test an AC contactor walks through those checks as they are done in production.
Circuit breakers have the same approach, with a different triggering mechanism. Rather than waiting for a motor to rotate, current is induced by a breaker test device and the delay for a breaker that operates is then logged. Small overloads will slow down tripping via thermal means, whereas a more severe fault may result in tripping in milliseconds. The difference between thermal and magnetic trip explains why both need testing, and our field guide on how to test a circuit breaker shows the multimeter side of the same job.
Automated Test Benches in Electrical Manufacturing
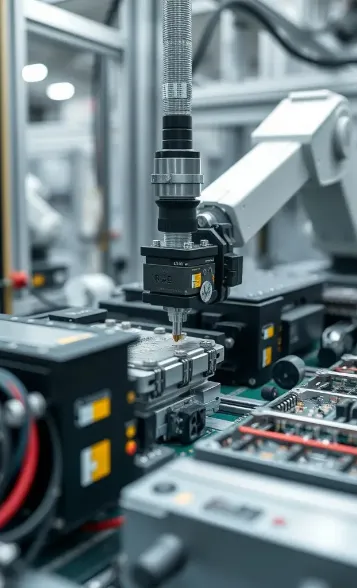
Each starter is tested one by one by a parts warehouse. Whereas factories that produce circuit breakers/contactors have to test thousands of products each day with no exception for proper testing. Thus it becomes important to have automatic test equipment available, which tests, evaluates and sorts the items without any operator being involved.
Benlong Automation manufactures such equipment for low electrical equipment producers. Here are some examples of using the starter idea at a much bigger level.
- The MCB automatic testing line checks thermal calibration, instantaneous trip and contact resistance, around 1800-2400 circuit breakers are tested within an hour at the accuracy of ±0.5% for the current and accuracy of ±1 ms during instantaneous trip.
- The AC contactor comprehensive test machine measures pick-up and drop-out voltage (accuracy of ±1% value), contact gap, number of poles, and dielectrical strength within a single testing chamber within 15-30 seconds.
- The MCB electrical endurance test bench is switching on and off the circuit breakers under rated current for as much as 20,000 cycles while checking for fused contacts as one checks for the starter being stuck in its position.
It shows that similar approach is used for testing different types of products that can also be applied in the garage: controlling input and output power and getting accurate measurable results.
Frequently Asked Questions
How do I check if my starter motor is bad?
Start with checking the essentials, ensure that the battery has a voltage reading of approximately 12.6 V and that none of the terminals are corroded or loose. The next step is to check the voltage reached at the small S terminal when the ignition is turned on by an assistant. If current is reaching the S terminal while the starter does not work as a result of any clicks or slow cranking, there is a good chance the starter may be defective. The best way to go about this is to take the starter out of the vehicle and perform a bench test to confirm that the problem does exist. More symptoms that indicate the existence of a problem with the starter include the sounds made by the engine during testing, the whirring sound made when the engine is not cranking, smoke, and that the starter has to be struck in order to make it work.
How to test a starter motor without removing it?
Employ a multimeter on the automobile. First measure battery voltage, then go to the S terminal, and then B terminal when an assistant turns the key to start the engine. If both terminals register power then a faulty starter may have to be replaced. A voltage drop test of the positive and ground wires when cranking would also be able to give a clue if either of those wires is defective. Another method would be to connect the B and S terminals with a remote starter switch to see if the engine starts without being on ignition.
How to trick a starter to work?
Hitting the starter housing with a hammer handle while someone turns the key is a classic trick, since it can free jammed brushes or a stuck solenoid for a few more starts. Starting with jumper cables, cleaning the battery terminals, putting car in Neutral, or bridging the B and S terminals with a remote starter switch (the car should be in Park or Neutral with the parking brake on) are also ways to make it run. These are temporary solutions, and a starter that needs tricks is nearly at the end of its life.
Can O’Reilly’s bench test a starter?
Yes. O’Reilly Auto Parts provides a service for testing starters and alternators free of charge. Customers can either take their starter to the store for testing or have it tested directly on the vehicle in the parking lot. This service is useful for people that do not possess a clamp meter and require testing because the tester used by O’Reilly Auto Parts measures both current and voltage to determine effective operation.
How many amps should a starter draw on a bench test?
The amount of electricity used by a starter is determined by its type. Most starts on passenger cars draw approximately 50 – 90 A without load, but large V8 machines, trucks and diesel engines may draw more power. Thus, always check specifications of your part. The most important trend to be observed is: high current and low speed indicates that there is either leakage of current or short circuit, low current with low speed – that brushes of the starter are worn out or there is poor connection, and zero current indicates that the circuit is open.
Can you bench test a starter with jumper cables?
Certainly, that is a method of DIY that is used commonly. Link the negative to the starter casing and the positive to the B terminal. Then, using a remote starter, briefly join the B terminal to the S terminal. Use thick wires, hold the starter in a vice, put on safety protective goggles, and limit each experiment to 3-5 seconds.
Conclusion
A bench test of the starter should be carried out by using clamps for fastening. In order to run the bench test, the terminals have to be connected to the power source so that the electricity goes through the starter. The next step is to activate the S terminal to cause the starter to work and make a clicking sound. If the results of the test indicate that the starter is functioning well, one can conclude that there are other vehicle malfunctions. The fact that the starter gives a sound when it is supposed to be working means that there is some malfunction of the starting mechanism of the vehicle. The occurrence of slow cranking and the smoking starter also means that there is a problem with the starter. To check all issues, one should use a multimeter and a clamp meter. It should be noted that if the motor is not functioning properly, it does not mean that the starter is the reason for that.
If you want to test your product even beyond the garage, this method will help you on the level of factory floor. Those who produce circuit breakers, contactors or other low-voltage electric devices, can get in touch with the Benlong team in case the automated test stands may be suitable for production lines. Provide them with your device models and testing specifications for advice.