benlong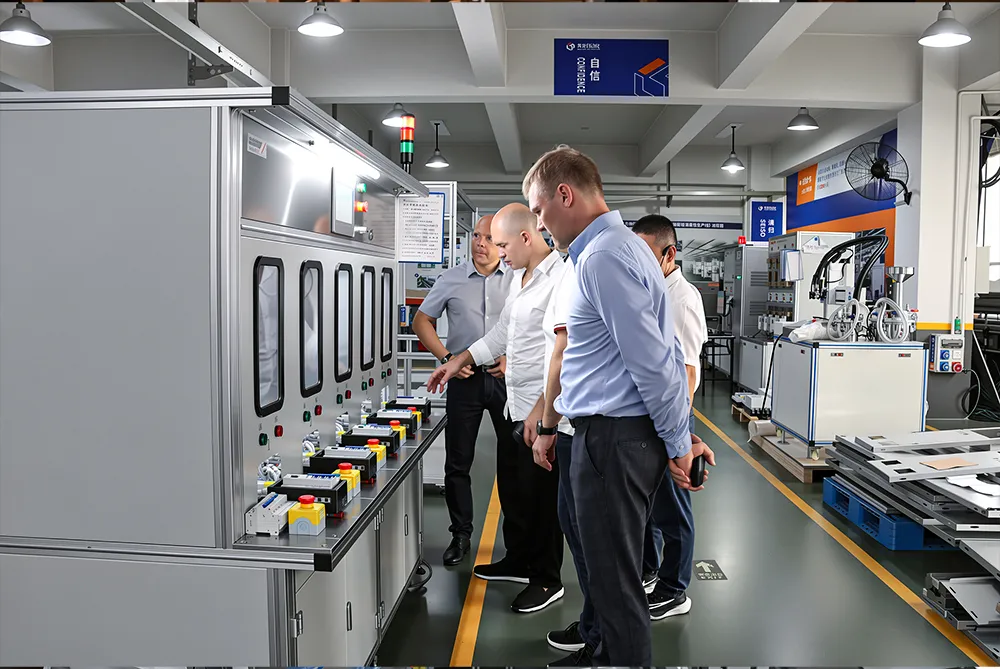


Best Practices for Specifying Custom Fitting Requirements to a Fabricator
You have designed your special component, which may include a machined part, molded piece, or stamped part, and are now in search of a suitable manufacturer. This stage of a project is where good companies thrive and bad companies fail: specification handover. If you send a basic sketch and a vague email to your manufacturer, the result will likely be a part that is off-spec, made of unsuitable materials and arrives three weeks late. Conversely, if you send a complete specification, the manufacturer will deliver exactly what you need on time and at the price point quoted.
This guide will give you all the relevant information to instruct the fabricator properly on how to create the custom fitting from your point of view as a customer. It will provide you with sufficient explanations on what should be understood by a fabricator, including drawings and tolerances, specs and quantities, quality standards, packaging, and communication and delivery issues.
If you wish to get your specific sizing needs across to a manufacturer in a concise manner, there are eight elements you should gather first. And these are: (1) engineering drawing or 3D model with GD&T dimensions; (2) material specification with the grade, temper and certification; (3) tolerances by function (don’t go to extremes with tolerances); (4) surfaces and finishing; (5) expected quantities, annual volume and delivery time; (6) quality requirements such as inspection plan or FAIR/PPAP; (7) packing and labeling requirements; (8) goals for approval.

Why Specifications Fail: The 5 Common Causes
Before you can implement best practices, you need to know what exactly you’re up against. In every industry, custom parts fail for one or more of the following five reasons:
| # | Failure Cause | Typical Result | Fix |
|---|---|---|---|
| 1 | Ambiguous tolerances (no GD&T, “standard tolerance” assumed) | Parts out of spec, assemblies don’t fit, rework | Put every critical dimension on the drawing with an explicit tolerance |
| 2 | Material grade mismatch (“stainless steel” instead of “SS 316L”) | Corrosion, strength failure, rejected batch | Specify exact grade + temper + standard (ASTM/EN) |
| 3 | Missing surface finish spec | Wrong appearance, poor fit, sealing failures | Call out Ra values and cosmetic zones |
| 4 | Unclear volume/forecast (proto vs production pricing mixed) | Wrong price, wrong process choice, surprises | State prototype vs annual volume clearly |
| 5 | No acceptance criteria (what does “good” mean?) | Disputes at delivery, missed defects | Define the inspection plan and pass criteria in writing |
All of them can be prevented through specifications, and that’s why this guide exists.
The Baseline: What to Prepare Before Contacting a Fabricator
Get together this packet before sending your first request:
- CAD file — STEP/IGES (neutral file formats work better; some manufacturers prefer working with original SolidWorks, Fusion 360, or Solid Edge files). Send the complete assembly if fit is essential, not only the part.
- Engineering drawing (PDF) — views, dimensions, GD & T, title block with the part number, revision, material, and tolerance block.
- Material description — the exact type and grade, official name of it, quality grade and necessary certificates (in this case EN 10204 3.1 mill certificate).
- Quantity and forecast — the first order, yearly volume, and increasing demand.
- Lead time requirement — necessity of prototyping vs mass production.
- Quality demands — inspection requirements (ISO 2768 general tolerances), FAIR/PPAP, certificates, samples.
- Commercial conditions — Incoterms, payment conditions, and target price (if available).
In case you are not able to make a drawing or CAD file, it is ok to let the manufacturer know. Many people are ready to help with creating the specification, though it raises the price and risks as well. The more complete the initial information, the better the quotes.
1. Engineering Drawings and 3D Models
The drawing serves as an agreement between you and the manufacturer. Best practices are as follows:
- Include a 3D model along with 2D drawing. The model contains geometry while the drawing contains tolerances and notes. Don’t send only a model; the manufacturer will guess the tolerances which is where problems begin.
- Include a title block which contains part number and revision letter, material, scale, type of units (imperial/meters — state), and say about general tolerance block (ISO 2768-mK, or state it).
- First dimension the functional features. Datums, critical bores, mating surfaces — dimension what is functional, while everything else is general tolerance.
Use GD&T in places where it is applicable (position, flatness, concentricity) — but do it in moderate amounts; too much makes it difficult to follow any logic and increases cost of production. - Do not forget to add notes in places of geometry where necessary: deburring edges, not allowing sharp corners, and giving information about thread class, direction of surface texture etc.
2. Tolerances: The Right Level of Precision
This is practically the most critical part of your specifications. The main principle: allow tolerance only where it is needed, and otherwise be as lenient as possible.
- Always ask: “What if this dimension is is distorted by 0.1 mm? 0.5 mm?”. If everything is in place, apply the general tolerance for the given case (usually it is ±0.5 mm for machining processes, ±0.1-0.2 mm for tight features and ±0.05 mm where absolutely necessary).
- The more precise the tolerance, the more costly the production becomes. If you change the tolerance from ±0.1 mm to ±0.01 mm you will multiply the price in 3-5 times. Thus, one part with, for example, 20 important features with a tolerance of ±0.01 mm becomes perfectly improvable.
- You need to apply GD&T for features important for assembling purposes. In this case it is much better to utilize position tolerances with datum references rather than just using ± dimensions.
- You should mention the general tolerance standard in the title block so that the unmarked dimensions will be taken according to the specified value anyway.
It would be good for you to develop such habit as writing on the drawing: “ALL CRITICAL DIMENSIONS ARE CALL OUT; ALL OTHERS PER ISO 2768-mK.”
3. Material Specification
More field failures are attributable to ambiguous material specifications compared with anything else. Good practices:
- Identify the correct type of material; for example, use “SS 316L as per ASTM A276 (bar) / ASTM A240 (plate), solution annealed” instead of just saying “stainless steel.” For aluminum, instead of merely saying “aluminum,” identify it as “6061-T6 according to ASTM B211.”
- Provide the specification of the material; in other words, inform about whether it is T6 or T651 and whether it refers to an annealed or cold-drawn material.
- Mention the source; when referring to a bar, plate, forging, or cast material be advised that every form has different properties and costs.
- Request certificates; for example, require EN 10204 3.1 certificate when the material is used in pressure or structural applications.
- Specify no substitutions; for example, say “no substitutions allowed without written consent.”
- Specify coating type; for example, if referring to zinc coating, provide related standards, such as ASTM 633.
4. Surface Finish and Appearance
Surface finishing impacts both operation (such as sealing, friction, and fatigue) and looks (i.e., customer-visible parts). Make sure to mention it clearly:
- Ra values for functional surfaces: “Ra 0.8 μm on sealing surface,” “Ra 1.6 μm general machining,” “Ra 3.2 μm non-critical.” Consult ISO 1302 symbols for the drawing.
- Cosmetic aspects to mention: “No scratches should be visible on the outer surface,” “consistent grain direction,” and “free of burrs on all edges” — make a note of these.
- Edge correction: break all sharp edges by 0.2-0.5 mm, specify the size of chamfer, and deburr internal corners.
- Details related to coating/plating: specify the kind, thickness range, color, masking areas, and standard.
- Sample appearance: for aesthetic pieces, it is a good idea to approve a sample or finish standard (e.g., “matching the sample no. X”) before production.
5. Quantities, Volumes, and Lead Times
The number you report determines what type of manufacturing process you utilize.
- These three numbers, prototype quantity, initial order, and annual volume forecast, are helpful in elaborating your decision: if your part is quoted for 10 units, it could be mechanically worked; at 10,000 units, it could be casted or molded; at 100,000 units it might be automated using a completely different technology.
- Make sure you define your lead time: when do you require your prototypes (1-3 weeks for parts made with CNC technology, 2-6 weeks for casting/molding tooling), how much time do you need for production (4-12 weeks).
- Talk about process selection freely: if your volume permits it, ask your contractor to recommend what procedure would be better for the project — real professionals will recommend the most suitable process based on the amount of production.
- Be ready for revisions: plan at least one round of prototypes.
6. Quality, Inspection, and Documentation
The term “quality” should be explained in the specification document; otherwise, it will be interpreted in its cheapest way possible:
- Mention any of the established inspections standards, such as ISO 2768, ASME Y14.5 GD&T, or the specific inspection plan meant for use on the project.
- Apply the definition of First Article Inspection Report (FAIR). This is a dimensional report for the first production part against the drawing, which is a standard adopted for the aerospace and medical industry, but may be used for any significant product.
- Request PPAP (Production Part Approval Process) for automotive suppliers, which show the complete capability of the process (at the levels from 2 to 3).
- Indicate the certificates that should be provided: material certification (EN 10204 3,1), heat treatment report, hardness test, surface quality report, and coating thickness report.
- Explain what sampling is supposed to mean in this case, e.g. 100% inspection for particular nodes, AQL inspection for the rest of the details, including actions w.r.t. rejected parts (RMA, repair, replace).
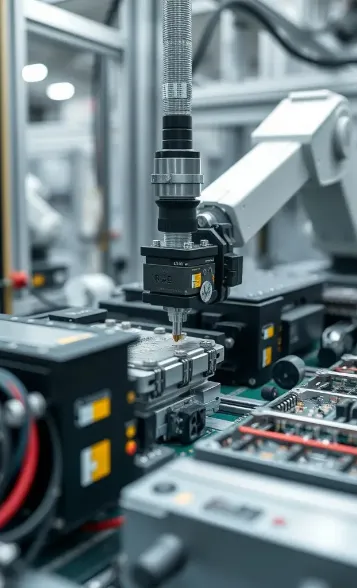
For parts feeding into automated production — like components for circuit breaker assembly lines — dimensional consistency across the batch matters as much as the spec itself; the same process-discipline thinking that governs automated vs manual testing applies to incoming inspection. On the fabricator side, automated assembly and testing equipment for electrical products shows what consistent process control looks like at production scale.
7. Packaging, Marking, and Delivery
The final elements of the specification enable the last failures to be avoided:
- Packaging specifications: protection of parts (separators, foam pads, anti-corrosion wrapping), type of box/carton used, palleting system, and labeling requirements.
- Marking: part number, revision, date code and batch/lot number for each part or label – to ensure traceability.
- Anti-corrosion: VCI paper or oil for steel items during shipping, especially overseas.
- Incoterms: EXW, FOB, CIF, DDP to be specified for the sake of price comparison.
- Mode of transportation: air, sea, or land and time of transit.
8. Approval Milestones and Samples
Custom parts must go through approval gates before proceeding to full-scale production. These are defined in the specification.
- Pre-production samples: Your fabricator will provide samples and you will compare them with the drawings and fit them into an assembly.
- Sample approval in writing: You need to confirm the sample approval, with commensurate comments — approved/ approved with modifications/ rejected (the document will shield you from any later doubts).
- First Article Inspection: Dimensional inspection report of the first item produced.
- Pilot batch: A production run (if the quantity allows us to do so) to check the consistency of the procedure.
- Production release: Full-scale production only after the pilot batch has been completed.
These gates are checkpoints and allow for the discovery of issues very inexpensively.

Communication and Project Management Best Practices
The specification does 80% of the work; communication discipline does the rest:
- The process must have one contact from each party involved. Everything goes through your PM and their PM — no side talks that do not leave a record.
- Put everything in writing. Put the RFQ, quotes, approvals, changes — everything written down and dated. Verbal agreements are the way projects start failing.
- Change control: any alterations being made to the drawing, materials, quantity, or schedule requires that there is a written change request with the impact of the change on the price and the lead-time approved before a change can be made. There are no such things as “small changes”.
- Milestone reviews: Hold status calls weekly or bi-weekly during production; ensure that at least the sample timing, the production, and the shipment dates are confirmed.
- Ask questions at the earliest possible time: in case a dimension looks strange, or if a material you believe to be wrong is used, the fabricator should raise a flag. You should encourage them to do so since their DFM feedback is free engineering.
- Conduct visits or audits for long-term partners: for strategic suppliers, conducting an on-site audit of the quality system proves to be a money saver — just like plant owners do when they audit their plants beforehand to secure quality.
- Acceptance documentation: agree on the acceptance test or inspection results format before delivery takes place, so there are no surprises during delivery.
How Clear Specifications Save Money
Instead of jumping into the work thinking of “savings,” you should take into consideration the economic costs associated with not doing it.
| Scenario | Cost of Doing It Right | Cost of Not Doing It |
|---|---|---|
| Ambiguous tolerance | 1 hour on the drawing | Rework or scrap of a batch — potentially $1,000s + delay |
| Wrong material grade | One line specifying 316L vs 304 | Corrosion failure in service — potentially $10,000s + liability |
| No sample approval gate | One sample round, 1-2 weeks | 10,000 defective parts — $50,000+ |
| Unclear volume forecast | 5 minutes stating annual volume | Wrong process quoted (CNC vs molding) — 3-5× cost overrun |
| No packaging spec | One paragraph | Damaged goods in transit, returns, customer complaints |
It’s important to note that specification only takes minutes and hours, while what it prevents may take days, weeks, and cost thousands of dollars. That is why the RFQ package is treated by professional buyers as the most valuable document.The same discipline applies when you outsource production machinery — a clear requirement specification for an automation line or machine determines whether the delivered system matches your throughput and quality targets.
Frequently Asked Questions
What information does a fabricator need to quote a custom part?
At the very least, a fabricator requires a drawing or a CAD model with all dimensions and tolerances; the precise material grade and specification used; the amount and expected volume per year; the required finish; the lead time; and any required quality/certification for the product. The more complete the package is, the more accurate and comparable the quotes are — which means less surprises later on.
How do I choose between machining, casting, and injection molding?
The key determinant is the yearly quantity and the configuration: minimal volume (1-500) = CNC manufacturing (no tooling, quick, adaptable); moderate volume (500-10,000) = casting or economical tooling molding; large volume (10,000+) = injection molding, die casting, or mechanized stamping (significant tooling cost distributed over many parts produced). Intricate interior design promotes molding; strict tolerance helps machining; bulky metallic parts favor casting. Consult with your manufacturer about the working method that should be used — a good one will guide you objectively.
What tolerances should I specify for a custom machined part?
Given a ±0.5mm as the regular standard (or ISO 2768-mK), use ±0.1mm for relevant functional mating features, and save ±0.02-0.05mm tolerances for cases where absolutely required (bearings, sealing surfaces, and accurate alignment). Only include dimensions that absolutely need it — the added cost of an unwanted tight dimension is unjustified. Include the regular standard in the title block so that nothing is left unclear.
What is a First Article Inspection (FAI) and do I need it?
A First Article Inspection Report (FAIR) is a report regarding the dimensions that shows that the first manufactured piece meets all the specifications as outlined in the drawings – it is the standard acceptance gate in aerospace and medical industry and the automotive sector, and it is good practice for any critical part of a product/process. Yes, you need it for every part that defects in it could cause rework, spoil the safety or impeding assembly. It’s inexpensive, yet it makes the first article an evidence of the capability.
References
- ASME Y14.5 — Dimensioning and tolerancing standard
- ISO 2768 — General tolerances standard
- ISO 1302 — Surface texture indication standard
- ISO 9001 — Quality management system for fabricators
- AIAG PPAP — Production part approval process manual
- ISO 10204 (EN 10204) — Inspection documents for metallic products
Conclusion
There are specific abilities necessary to know the requirements that the producers may have for a range of reasons. One of the key principles of this system is to know the particular requirements to minimize the quotations. Therefore, mentioning every detail in the RFQ means putting together the drawing with all of the tolerances and details, including the type of material that should be used, its surface characteristics, the quality of material, as well as the deadlines and requirements related to packaging. The use of communication theory in this system also implies work through one person for the whole period of production.
The system works through a connection based on the theory of writing down all requirements before giving quotations, and it is believed to be worth the activities spent. The system saves lots of working hours and enables avoiding ruining the product as a result of incorrect working practices in the production process. In addition to that, proceeding with the process helps to check the quality of the production of the company.