benlong

Injection Molding Guide: Process, Design Tips & Materials
Chances are you’ve got a plastic item right now. Be it a bottle cap, cellphone shell, dashboard piece of a car, or a casing of a medical instrument. In all likelihood, it was made through the injection-molding process. It can be said that injection-molding is the most commonly used production method in many industries that allows producing plastic products cheap and fast. So if you are just getting into the topic and are studying about it such as you are a designer, engineer, client, or factory supervisor, the injection-molding process may appear to you quite a complex issue: melt temperature, holding pressure, draft angles etc. This instruction reveals the process of injection-molding in simple words, so you have to be aware of the meaning of the very definition and how the machine works in general.
In simple words, Injection Molding describes a manufacturing technique, which incorporates plastic beads that are subjected to heat to melt them, after which liquid material is injected into a metal die, followed by cooling it till product is formed. The entire process of injection molding is comprised of 8 stages; these are drying, melting, injection, packing/holding, cooling, mold opening, expelling and repeating.
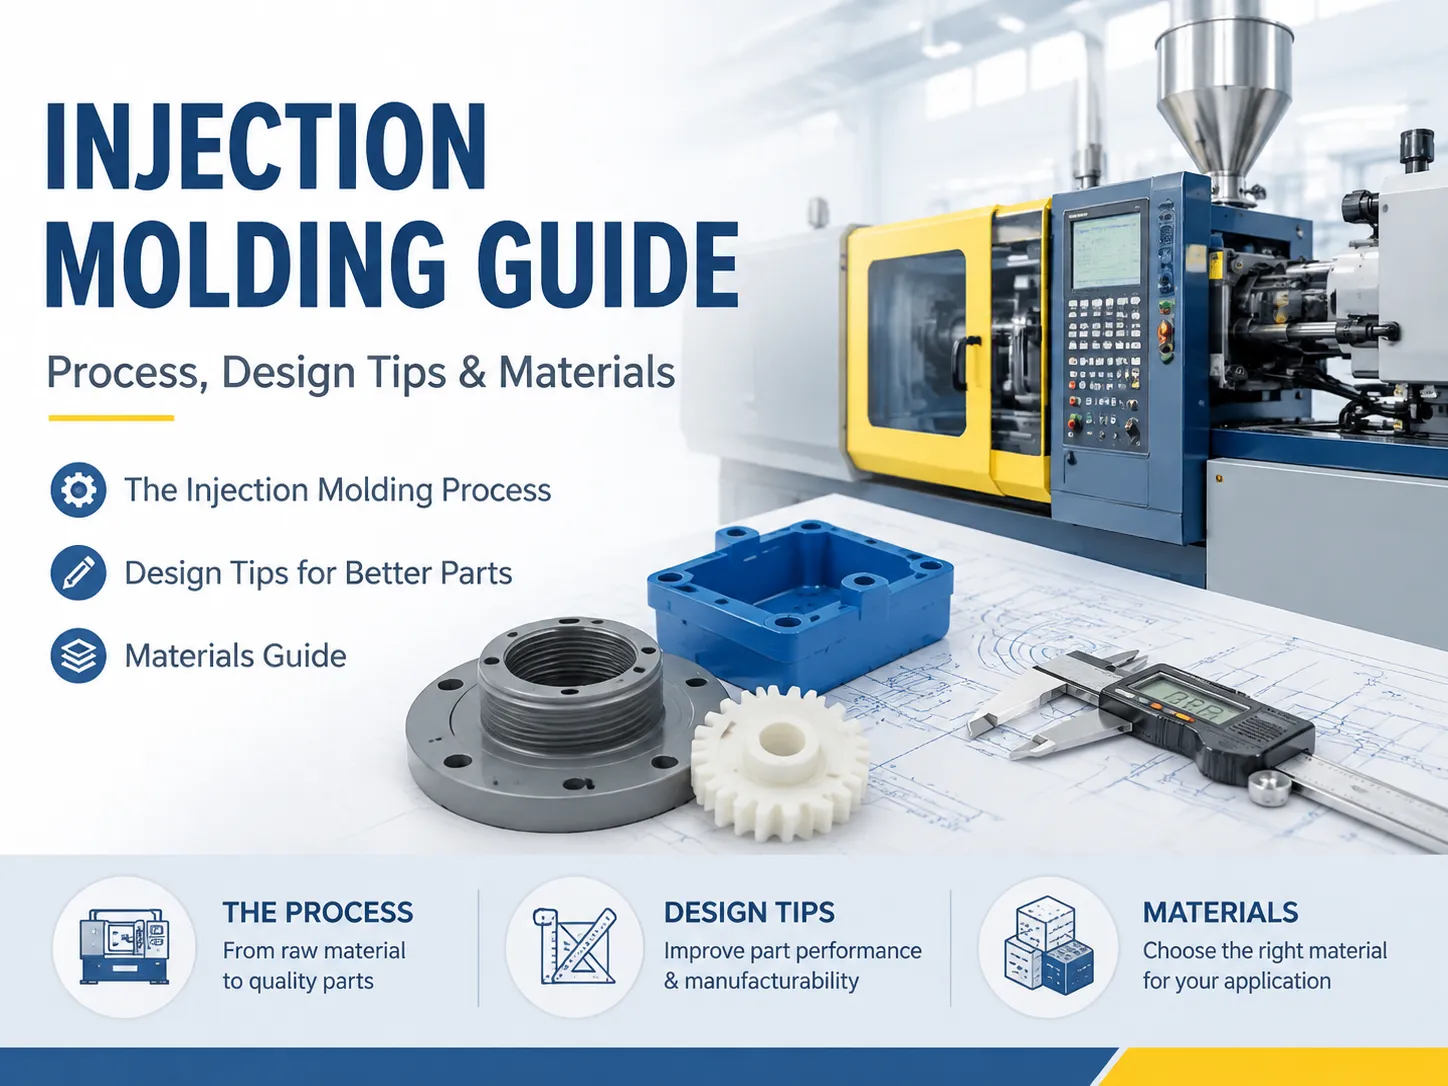
What Is Injection Molding?
Injection molding is a procedure that involves forcing liquid plastic into a solidified metallic die under high pressure, resulting in the creation of molded plastic. Below are some of the benefits offered by injection molding as a manufacturing process:
- Quick: The cycle time can be as short as 15 seconds; as such, thousands of products can be produced each day using the same die.
- Cheap: Cost incurred per product is minimal once the die is made.
- Accuracy: The tolerance can be below ±0.05 mm.
- Design flexibility: Injection molding can enable products to have complex forms, intricate details, texture and even some other components.
- Different types of materials: There are hundreds of different plastics one can use including food-grade and medical-grade plastics.
In fact, most plastic items that one can think of, from automobile dashboards to syringes, get manufactured with the assistance of injection molding.
How the Machine Works: Key Components
An injection molding machine has three main parts:
| Unit | Components | Function |
|---|---|---|
| Plasticizing (injection) unit | Hopper, barrel, screw, heater bands, nozzle | Feeds pellets, melts them, and injects the melt into the mold |
| Clamping unit | Fixed platen, moving platen, tie bars, hydraulic/electrical clamp | Holds the mold closed against injection pressure and opens it for ejection |
| Mold (tooling) | Core, cavity, runners, gates, cooling channels, ejector pins | Shapes the part; made of hardened steel or aluminum for prototypes |
In addition to the machines mentioned before, the cell operates other types of equipment such as material dryers used for hygroscopic plastics, mold temperature control devices, chilling devices, conveyors, and robots responsible for removing parts. The clamping forces are measured in tons: machines with low clamping pressure have capabilities of 30 to 100 tons while machines used in automotive engineering have very strong clamping forces ranging 1,000 to 4,000 tons.
If you’re planning to produce molded parts in-house, understanding how the mold is designed and built is half the battle — our guide to the injection mold development process walks through the full journey from concept to production tool.
The Injection Molding Process Step by Step
The process of manufacturing plastic products using the injection molding technique actually consists of many crucial steps, described below.
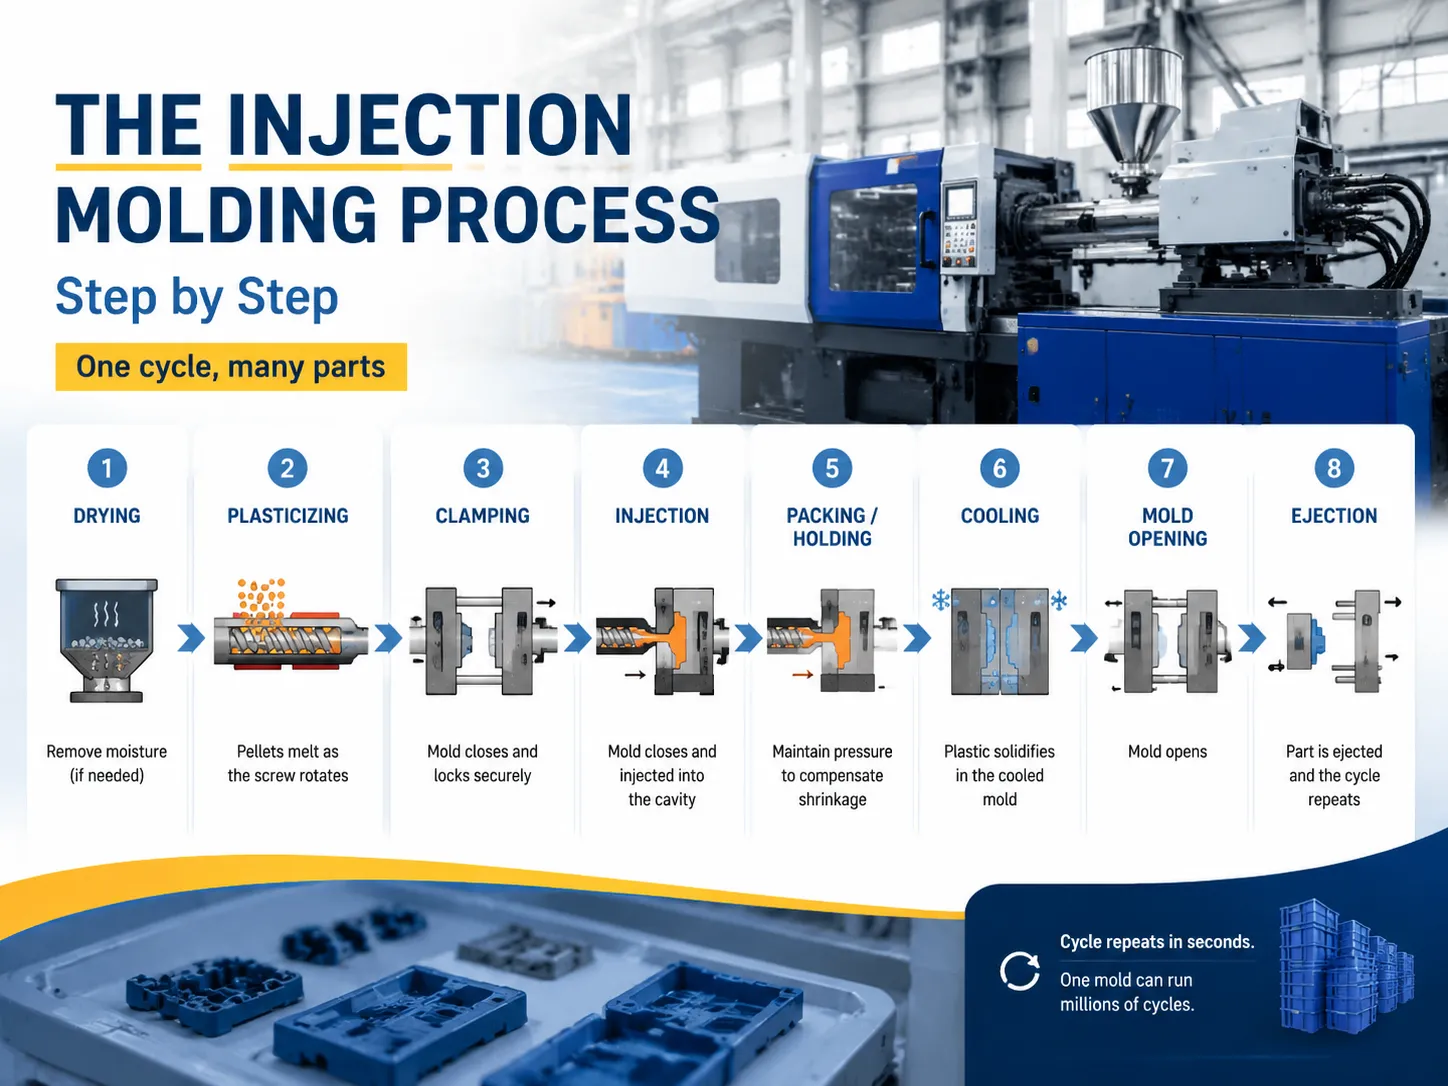
- Drying (if necessary): Now, as many plastic resins absorb water easily, they need to be kept dry (e.g. nylon takes about 2-4 hours at 80-90 degrees Celsius). Some resins do not require drying.
- Plasticization: The expensive screw drives polystyrene pellets through heated cylinders, thus creating friction in the process of moving, resulting in melting. Temperature of a molten plastic is usually 180-320 degrees Celsius depending on the kind of plastic.
- Clamping: The process of closing and locking the mold to ensure that it will withstand injection pressure.
- Injection: The screw moves like a plunger and forces the plastic to flow into the cavities of the mold.
- Packing / holding: The mold is kept under pressure of about 40-60% of injection pressure to pack additional plastic into the mold to compensate for shrinkage.
- Cooling: Plastic is solidified inside the cooled molds. Cooling time often becomes a determining factor in the duration of the entire manufacturing process.
- Opening mold: The mold is unlocked and opened.
- Ejection: The part is pushed by ejector pins.
If you’d like a concrete example of processing parameters for one material, our HDPE injection molding processing guide details melt temperature, mold temperature, pressure, and shrinkage for high-density polyethylene.
Key Processing Parameters
Getting these four parameters right is the difference between good parts and scrap:
| Parameter | What It Controls | Typical Range |
|---|---|---|
| Melt temperature | Flow, surface finish, degradation risk | 180–320°C (material-dependent) |
| Mold temperature | Surface finish, shrinkage, cycle time, crystallinity | 20–120°C (higher for engineering plastics) |
| Injection pressure | Filling completeness; too high causes flash | 70–180 MPa |
| Holding pressure & time | Shrinkage compensation, sink marks, dimensions | 40–60% of injection pressure, held 50–80% of cooling time |
| Injection speed | Fill pattern, weld lines, surface defects | Profiled per part geometry |
| Cycle time | Production rate & cost per part | 15–120 seconds typical |
Troubleshooting rule of thumb: change one variable at a time and run 10–15 cycles before judging the result. Common defects — sink marks, warpage, short shots, flash, burn marks — each have known causes and fixes. Our overmolding troubleshooting guide covers defect diagnosis for molded parts in detail.
Choosing the Right Material
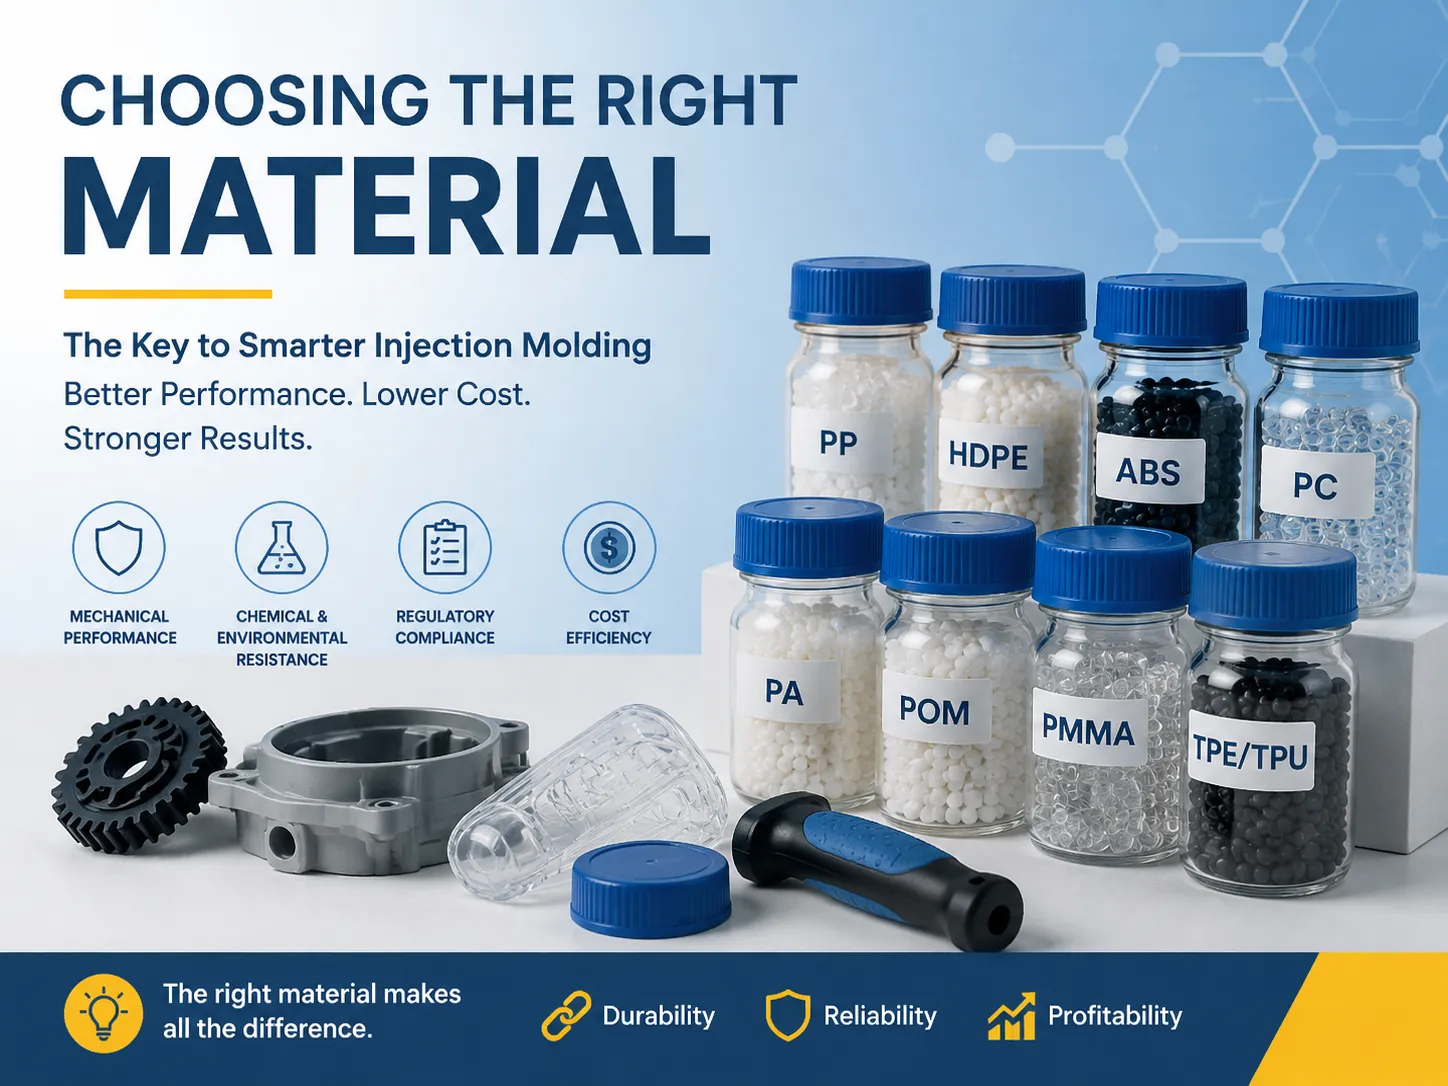
Material selection drives cost, performance, and processing behavior. Here are the most common injection molding materials:
| Material | Key Properties | Typical Applications |
|---|---|---|
| PP (Polypropylene) | Cheap, tough, fatigue-resistant, food-safe | Containers, caps, hinges, automotive interior |
| HDPE (High-Density PE) | Cheap, chemical-resistant, impact-resistant | Bottle caps, crates, toys, pipe fittings |
| ABS | Strong, glossy, easy to paint/plate | Electronics housings, auto trim, LEGO |
| PC (Polycarbonate) | Very strong, transparent, heat-resistant | Lens, shields, electronics, medical |
| PA / Nylon (Polyamide) | Tough, wear-resistant, low friction | Gears, bearings, fasteners, under-hood parts |
| POM / Acetal | Stiff, low friction, dimensionally stable | Gears, clips, precision mechanical parts |
| PMMA (Acrylic) | Optically clear, scratch-resistant | Lenses, displays, signage |
| TPE/TPU (Elastomers) | Flexible, rubber-like | Grips, seals, soft-touch overmolds |
Keep the following points in mind: mechanical properties (tensile, impact resistance), environmental conditions (UV resistance, chemical and heat resistance), compliance rules (FDA regulations for food products, UL regulations for electrical products, ISO 10993 for medical equipment), and cost. The technical data sheet (TDS) released by the resin manufacturers contains data that help you compare different materials.
Design Tips That Prevent Costly Mistakes
The guidelines listed below help to reduce expenses with tooling, molding, and assembly from making cost-effective products:
- Standardize wall thickness: Different wall thicknesses influence shrinkage rates and leave marks on finished products. If you need advice on wall thickness, then it is recommended that the optimal value for most products is from 1 to 4 mm, as thicker walls attract extra expenditures.
- Use correct degree of slope: The side wall should have a slope from 1 to 2° because this increases the efficiency of the molding process.
- Use large radii: Sharp edges concentrate force and increase likelihood of wall cracking. At least half of the wall thickness is a good radius to comply with.
- Make allowance for shrinkage: Assuming that various plastics shrink at different rates (from 0.4 to 3.5%), mold size must exceed the final wall size to avoid any discrepancies.
- Use ribs instead of thick walls: using ribs gives rigidity to the parts without increasing wall thickness (the thickness of ribs should not exceed 60% to 70% of wall thickness).
- Select optimal gate position: Gate positions should include spots that allow for an unhindered flow of the material at the same time avoiding sites with minimum seam strength.
For a hands-on look at how molds for precision parts are actually manufactured, our article on injection mold manufacturing covers machining, polishing, and assembly.
Mold Cost & When It Makes Sense
The mold is the biggest upfront expense — and the reason injection molding only pays off at volume:
| Mold Type | Cost Range | Best For |
|---|---|---|
| Aluminum prototype mold (single cavity) | $1,000–$5,000 | Prototypes, small runs (100–1,000 parts) |
| Steel simple production mold (single cavity) | $3,000–$15,000 | Simple parts, low–mid volumes |
| Multi-cavity steel mold (2–8 cavities) | $15,000–$60,000 | Mid–high volumes |
| Complex high-cavity molds (16+) | $60,000–$150,000+ | Mass production (e.g., bottle caps) |
When talking about production levels between 1,000 and 5,000 pieces per year, injection molding starts picking up against 3D printing and CNC. Any production run less than that will resort to prototyping technologies. With injection molding, tooling times typically take between four and twelve weeks, depending on the part’s complexity.
If you’re evaluating manufacturers for your molded parts, our ranking of top plastic injection molding companies is a useful starting point for comparing capabilities.
Injection Molding Across Industries
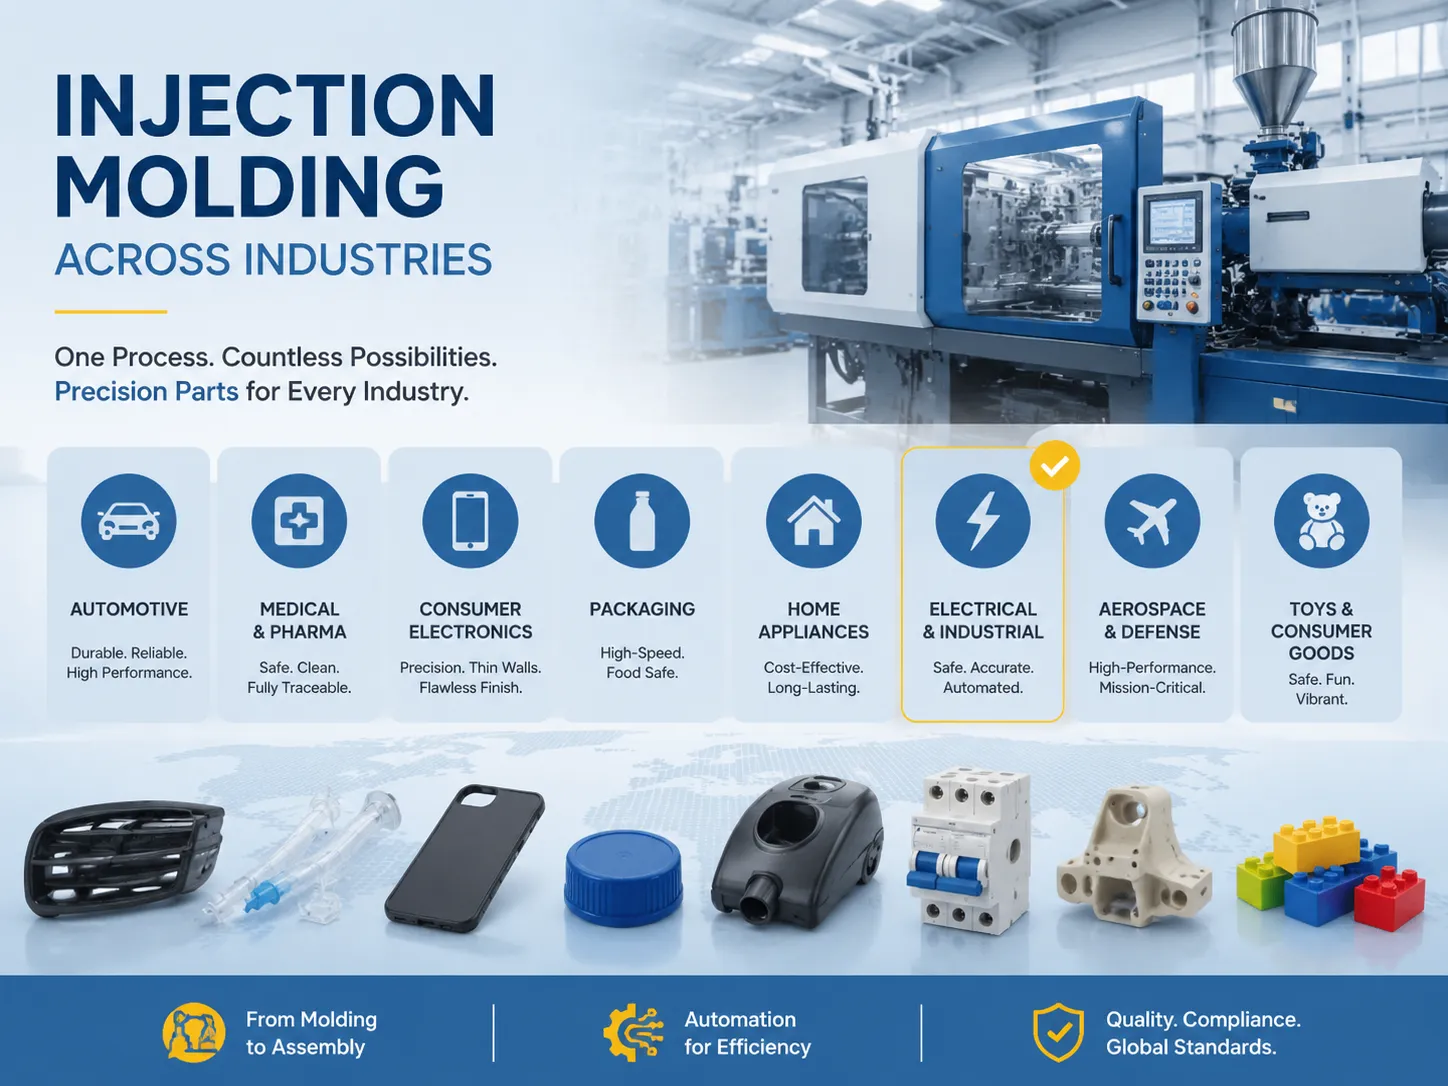
Injection molding serves every manufacturing sector, each with its own requirements:
| Industry | Typical Parts | Special Requirements |
|---|---|---|
| Automotive | Dashboards, bumpers, interior trim, under-hood components, connectors | IATF 16949, high-heat and impact grades, large-tonnage machines |
| Medical & pharma | Syringes, IV connectors, device housings, surgical tools | ISO 13485, cleanrooms, medical-grade resins, full traceability |
| Consumer electronics | Phone cases, laptop shells, connectors, housings | Thin walls, cosmetic surfaces, flame-retardant UL94 grades |
| Packaging | Bottle caps, closures, containers, tubs | High-cavity molds, food-contact (FDA) materials, fast cycles |
| Home appliances | Washer drums, vacuum housings, small appliance parts | Cost efficiency, durable materials, aesthetic finishes |
| Electrical & industrial | Circuit breaker housings, connectors, cable ties, switch components | UL ratings, flame retardancy, dimensional precision, automated assembly integration |
| Aerospace & defense | Interior components, brackets, housings | High-performance materials, tight tolerances, documentation |
| Toys & consumer goods | Action figures, building blocks, household items | Safety standards (ASTM F963, EN 71), vibrant colors |
Molded goods must definitely be referred to. In fully automated assembly plants, where the molding process takes place simultaneously with the assembling and testing procedure, the manufacturing of MCB housings and electrical contacts is executed.
Injection Molding vs. 3D Printing
| Factor | Injection Molding | 3D Printing |
|---|---|---|
| Per-part cost at volume | Pennies (very low) | High (per-part is always significant) |
| Upfront cost | High (mold $3,000+) | Low (no tooling) |
| Production speed | Seconds per part | Minutes to hours per part |
| Part strength | Strong (molded, no layer lines) | Weaker (layer adhesion) |
| Precision | ±0.05–0.1 mm | ±0.1–0.3 mm (varies by tech) |
| Material options | Hundreds of production grades | Limited (fewer engineering grades) |
| Best for | Mass production, tight tolerances, structural parts | Prototypes, low volumes (<100–1,000), complex geometries, design iteration |
A method of prototyping and validating designs is to use 3D printing for initial prototypes followed by injection molding in manufacturing. Manufacturers have devised various schemes called bridge tooling that make use of aluminum molds to accommodate this transition.
Frequently Asked Questions
What is injection molding?
Described as a manufacturing process that involves the melting of plastic pellets followed by their injection into a pressurized closed metal die, injection molding is mostly used to manufacture plastic components. Upon cooling, the die opens and the solidified molded component is removed. It is a widely used method of mass manufacture of plastic items of all forms, shapes and sizes including the covers of telephones, caps of bottles and construction parts of medical devices because it is the fastest and the most efficient technique.
Is injection molding better than 3D printing?
It depends on the production features. Injection molding is considered to be a perfect process for bulk production: the parts are inexpensive and quickly produced (cycles take up to a few seconds), accurate (the tolerance is ±0.05-0.1 mm), and hard (no visible layer lines are on the product). While 3D printing is perfect for prototyping and small-scale production, giving the opportunity to make changes instantly, and create a part that could not be made with injection molding. The main rule states that while 3D printing is used for small-scale (about 1000-5000 parts a year) and prototyping, injection molding is better suited for mass production.
How expensive is an injection mold?
The cost range for molds differs from one type to another: aluminum prototype molds are priced between $1,000 and $5,000; basic steel production molds from $3,000 to $15,000; multi cavity steel molds from $15,000 to $60,000; whereas complex high-cavitation molds can be priced above $60,000 and up to $150,000 and even more. The price depends on such factors as size, complexity of the part, number of cavities and type of steel. The lead time is usually about 4 to 12 weeks after making the payment. Though, despite the high initial costs, the process becomes much cheaper with a higher number of produced parts; in cases of mass production, it is possible to achieve less than one cent per unit production.
What are the disadvantages of injection molding?
Important shortfalls include: (1) high startup costs for tooling techniques, since molds cost from thousands to hundreds of thousands of dollars; (2) the long lead time needed for the creating of mold – on average, it can take from four to twelve weeks, keeping the product from appearing on the market for a long time; (3) high cost of production for low volumes because it’s not practical to produce less than 1000-5000 parts; (4) design limitations as the parts require a uniform wall thickness, taking into account angle of draft and fitting into a gating system; (5) necessity for setup and adjustment of equipment for the production of the first group of parts; (6) small production output.
References
- Plastics Technology Magazine — Industry publication covering injection molding machinery, process parameters, troubleshooting, and material data for molders.
- ENGEL — Major injection molding machine manufacturer; their technical resources document machine setup, process control, and application guidance.
- KraussMaffei — Injection molding machine manufacturer with published processing guides and application expertise across automotive, packaging, and medical sectors.
- ASTM International — Publishes standards for plastics testing (tensile, impact, flow) used to qualify molded parts and materials.
- ISO — Publisher of ISO 9001 (quality), ISO 13485 (medical devices), and ISO 294 (injection molding of test specimens) standards relevant to molding operations.
- ScienceDirect — Injection Molding Overview — Engineering reference covering injection molding theory, process stages, and defect mechanisms.
Conclusion
The process of injection molding is now dominating in manufacturing because it’s quick, accurate, and relatively inexpensive for mass production. The principles of manufacturing stay the same no matter what is being produced – be it a plastic bottle cap or an automotive or a piece of medical equipment.